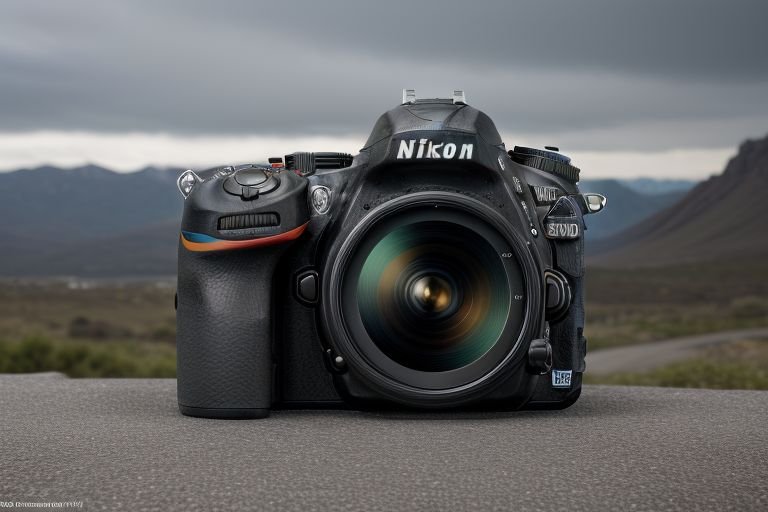
The Nikon D7500, a popular choice among photography enthusiasts, sometimes presents challenges that can stump even seasoned users.
Let’s demystify 10 common issues you may encounter while using this impressive DSLR and provide solutions to overcome these obstacles.
10 Common Nikon D7500 Problems

Whether you’re a budding shutterbug or a seasoned pro, encountering issues with your camera can be a challenging experience. Don’t fret, though – most of the common problems with the Nikon D7500 can be resolved with a few simple steps. Here’s a list of issues you might come across and some quick fixes:
- Shutter Speed Issue: Blurred photos often result from inappropriate shutter speed settings. Try adjusting it based on your shooting conditions and subject movement.
- Autofocus Problem: Check your lens for any dirt or smudges. Also, ensure your shooting distance is within the lens’s focus range.
- Overexposure Issue: If your photos are too bright or washed out, look at adjusting the ISO settings or exposure compensation.
- Flash Problem: If your flash isn’t firing, check your camera settings, battery level, and if need be, seek professional help.
- Battery Drain Issue: Optimize your power management settings and consider replacing an old battery.
- Firmware Update Problem: Make sure your battery is fully charged and the right update file is being used.
- Lens Compatibility Issue: Not all lenses are compatible with all cameras. Verify the compatibility and condition of your lens.
- Image Stabilization Issue: Enable the VR (Vibration Reduction) setting and consider using a tripod.
- Low-Light Performance Issue: Tweak your ISO settings, shutter speed, and aperture to improve low-light photography.
- Color Accuracy Issue: Ensure your white balance settings are adjusted according to the lighting conditions.
Troubleshooting the Shutter Speed Issue

Experiencing a series of blurred photos? It’s likely you’re grappling with a shutter speed issue. Here’s the good news: most times, a simple manual adjustment can resolve this problem. The trick lies in matching the shutter speed to your shooting conditions and the movement of your subject.
In a situation where your subject is in motion, a higher shutter speed is your best bet. This captures the action without any blur. Conversely, if you’re shooting a stationary object or scene, a slower shutter speed should do the trick.
However, sometimes even the most steady of hands can inadvertently introduce blur into an image. This is where a sturdy tripod becomes your best friend. By providing a stable base for your Nikon D7500, a tripod can significantly reduce image blur, irrespective of your chosen shutter speed. Remember, clear and sharp images are the goal, so don’t be afraid to experiment with various shutter speeds until you nail that perfect shot!
Solving The Autofocus Problem

Does your Nikon D7500 refuse to focus properly? Don’t let that become a stumbling block on your creative journey. Understanding the root cause is the first step in rectifying this problem. Autofocus issues can be linked to a dirty lens, an incorrect focus setting, or even being too close to your subject.
Begin by inspecting your lens. If you spot any smudges or dust, give it a gentle cleaning. Now, dive into your camera settings. Ensure you haven’t accidentally slipped into manual focus mode.
If you’re in the clear there, evaluate your shooting distance. Each lens has a specified minimum focus distance. If you’re closer than this range, the camera may struggle to focus. Ensure you maintain a suitable distance from your subject.
Tackling autofocus problems may feel a bit daunting at first. But with these tips, you’re well-equipped to reclaim control over your Nikon D7500’s autofocus. After all, clear, focused shots are the cornerstones of great photography. So, go ahead, implement these solutions, and get ready to capture your next masterpiece with renewed confidence!
Addressing the Overexposure Issue
A white, washed-out photo can be a heart-breaking sight for any photographer. An overexposed image is often the result of your Nikon D7500’s ISO setting being cranked up too high. Fret not, this is an issue that’s easy to remedy. You could try bringing the ISO down to a lower level. If that doesn’t seem to do the trick, try adjusting the exposure compensation to a negative setting.
If you’re still noticing overexposure, perhaps it’s time to explore other camera settings. A narrower aperture, or f-stop, can limit the amount of light entering the lens, thus preventing overexposure. Alternatively, you can speed up your shutter – a faster shutter speed decreases the time light has to hit the sensor, reducing the chance of overexposure.
Remember, photography is all about balance and experimentation. Don’t be discouraged if your initial adjustments don’t yield perfect results. It might take a few tries before you find the right combination of settings to prevent overexposure in your specific shooting environment. So, keep adjusting and keep shooting, because the perfect shot could be just a setting away!
Rectifying the Flash Problem
When your Nikon D7500’s flash stubbornly refuses to fire, you might feel like you’re left in the dark. However, a few simple steps can bring you back into the light. Start with the basics: make sure that the flash is enabled in your camera settings. Sometimes, it’s just that simple. But what if it isn’t?
If your flash remains unresponsive, your battery could be the culprit. A flash requires a significant amount of power to operate. If your battery is running low, it might not have enough juice left to power the flash. Try recharging your battery and then testing the flash again.
Still no flash? Then we might be looking at a mechanical issue. The flash mechanism in your Nikon D7500 is intricate and delicate, and it could malfunction due to a variety of reasons such as impact damage or prolonged use. In such cases, it’s best to seek professional help.
Expert technicians can diagnose and fix the problem without causing further damage to your camera. While it might be tempting to try and fix it yourself, remember, the innards of a DSLR are intricate and sensitive. A slight misstep could exacerbate the problem. So, step back, take a breath, and let the pros handle this one.
Resolving the Battery Drain Issue
Ever felt the frustration of seeing your Nikon D7500’s battery symbol blink in desperation when you’re just about to capture that perfect shot? Welcome to the mystery of the quickly draining battery. Let’s roll up our sleeves and get down to some detective work to solve this enigma.
Begin your investigation in the realm of power management settings. Using the trusty viewfinder instead of the battery-guzzling LCD screen can save significant battery life. Have you turned off Wi-Fi and Bluetooth when they’re not in use?
These features, while useful, can stealthily sap your battery power. Another small, but mighty battery-preserving tip: disable image review. You’d be surprised at how much power this little trick can save.
Okay, so you’ve tweaked the settings, but your battery still seems to fade too fast? It might be time to bring in a new player. Batteries, like us, age and lose their power retaining capacity over time.
It could be that your Nikon D7500 is simply ready for a fresh, new battery. So, don’t let a draining battery drain your enthusiasm. With these tips, you’re ready to power up and keep those memorable shots coming!
Fixing the Firmware Update Problem
Does your Nikon D7500 seem reluctant to accept a firmware update? Fear not, firmware foibles are far from insurmountable. The first thing you need to do is check your battery’s charge level. Firmware updates are serious business and demand a full-powered battery.
Once you’ve ensured your battery is brimming with juice, it’s time to check the file. Confirm you have the right one, tailored specifically for your Nikon D7500. Even the best of us can occasionally grab the wrong file off the internet!
Still unable to update? You might need to pull out the big guns. A factory reset, while a bit drastic, could do the trick. It’s like giving your camera a fresh start, removing any lingering settings or tweaks that might be getting in the way of your firmware update.
Be mindful though, a factory reset means exactly that – all your personalized settings will revert back to their original state. So, be prepared to reconfigure them after the reset. Here’s to making peace with your firmware and continuing your adventures with your trusty Nikon D7500!
Correcting the Lens Compatibility Issue
Ever found yourself excited about using a new lens only to discover it doesn’t quite play ball with your Nikon D7500? It’s a common hiccup that can crop up in the world of DSLRs. The key here is understanding that not all lenses and cameras speak the same language.
First off, you’ll want to confirm whether your lens is indeed compatible with your Nikon D7500. A quick online search should provide you with a compatibility chart to cross-verify. If it turns out that the lens isn’t a match, it’s time to explore other options that are better suited for your camera.
On the other hand, if the lens is compatible and still giving you trouble, the culprit could be lurking elsewhere. Have a closer look at your lens. Any damages, no matter how small, could lead to compatibility issues. Similarly, ensure the lens contacts are spotless and free from grime.
Lastly, consider giving your camera a fresh start by resetting it to default settings. This might sound a bit extreme, but sometimes it’s just the nudge needed to get your Nikon D7500 and lens back in sync. So, dive into these solutions and let’s get you and your camera back to capturing those picture-perfect moments!
Solving the Image Stabilization Issue
Is your Nikon D7500 serving up a steady diet of blurry photos? This could be a sign that you’re wrestling with an image stabilization issue. The first line of defense here is your VR (Vibration Reduction) setting.
It’s a nifty feature that’s built to counteract camera shake, helping you nail those crisp, sharp shots. So, take a quick detour into your camera settings to make sure that VR is switched on.
Now, if VR is on and you’re still seeing blurry images, it might be time to bring some stability reinforcements. A tripod can be a game-changer in these situations. Its steady support can significantly cut down on camera shake, improving the sharpness of your images.
No tripod on hand? No problem. Find a sturdy surface to stabilize your camera – it could be anything from a wall to a stack of books. Remember, in the battle against blur, every bit of stability counts!
Implementing these solutions can help you regain control of your image stabilization, so go ahead, give them a try. With sharper, clearer images within your grasp, your Nikon D7500 will be back to delivering the spectacular results you’re used to, in no time!
Addressing the Low-Light Performance Issue
Photographing in low-light scenarios can be a bit like venturing into the unknown. It’s a territory where your Nikon D7500 might initially seem out of its depth. But, a few adjustments can help your camera rise to the challenge.
Start by taking a closer look at your ISO settings. ISO governs how sensitive your camera is to light. In a low-light environment, a higher ISO setting can help compensate for the lack of light. But remember, a higher ISO also increases the graininess or ‘noise’ in the image. So, it’s all about striking that sweet balance.
Your shutter speed can be another tool in your low-light arsenal. By slowing down the shutter speed, you allow more light to hit the sensor, brightening up your image. But beware, slower shutter speeds make your camera more susceptible to movement and blur.
Opening up your aperture can be another effective strategy. A wider aperture lets in more light, which can be beneficial in low-light conditions. If these adjustments still leave you in the shadows, consider incorporating a flash or an additional light source.
A little extra light can go a long way in low-light photography, transforming murky frames into vibrant images. So, gear up and delve into the exciting realm of low-light photography with your Nikon D7500!
Resolving the Color Accuracy Issue
Colors not popping quite right in your photos? You might be dealing with a color accuracy issue. This can often be traced back to your Nikon D7500’s white balance settings. The white balance is like the translator between the color temperature of the light and your camera’s sensor. When it’s off, the resulting images can look too warm (yellowish) or too cool (blueish).
One quick fix is to adjust your white balance settings according to the lighting conditions. Each lighting scenario, whether it’s daylight, shade, fluorescent light, or tungsten light, has a corresponding white balance setting on your Nikon D7500. Dialing in the appropriate setting can help ensure that the colors in your images are true to life.
If manually setting the white balance seems a bit daunting, don’t worry! Your Nikon D7500 comes equipped with an Auto White Balance (AWB) setting. When engaged, this handy feature assesses the light in the scene and automatically adjusts the white balance, aiming for the most accurate color representation.
Remember, photography is a game of adjustments and fine-tuning. Don’t be discouraged if you don’t nail the color accuracy on the first try. Keep experimenting with your white balance settings until your Nikon D7500 captures colors just as you see them!


